First day after work this week actually making forward progress on the plane. Other days were involved in indirect things like hanging more lights in the garage.
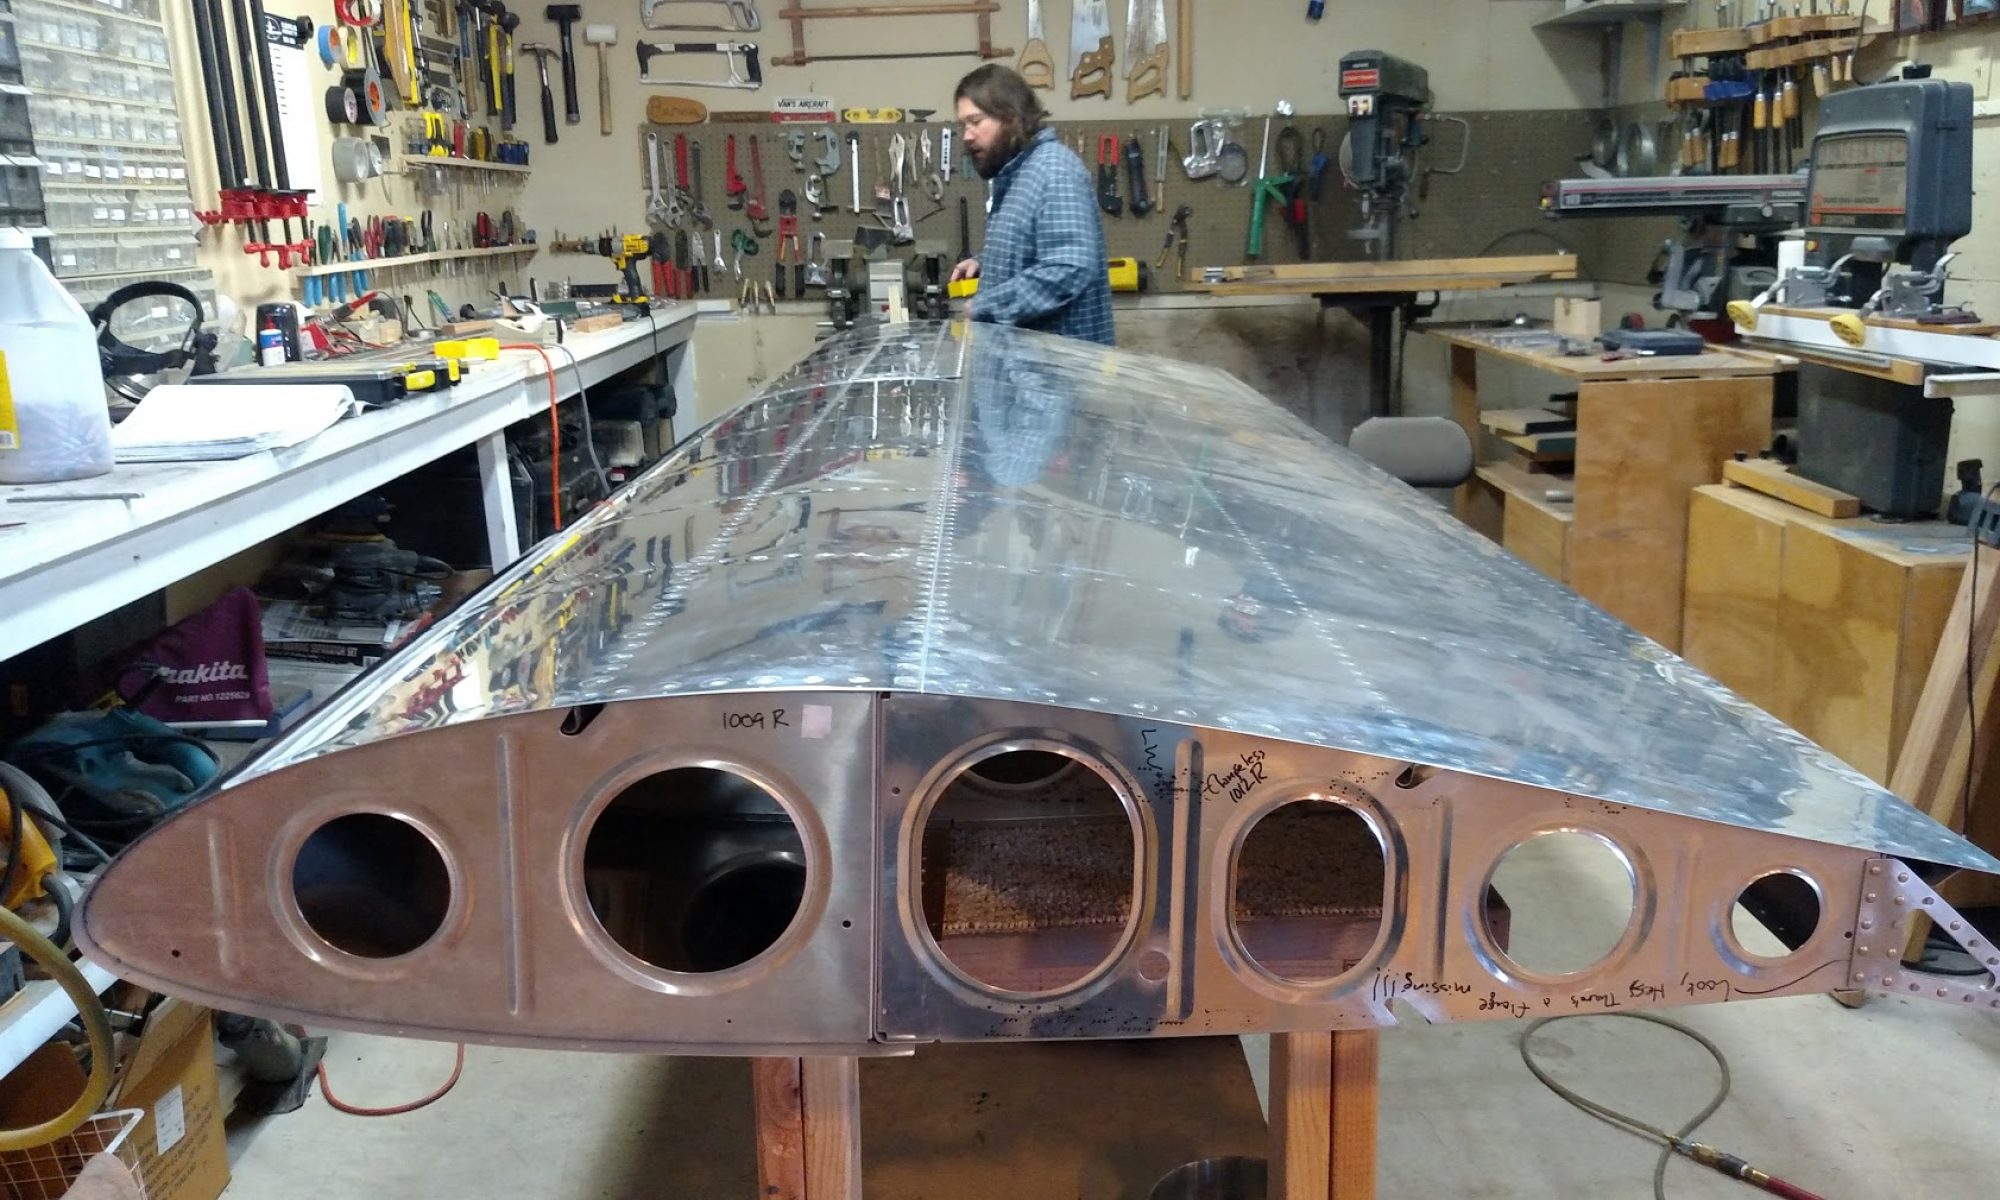
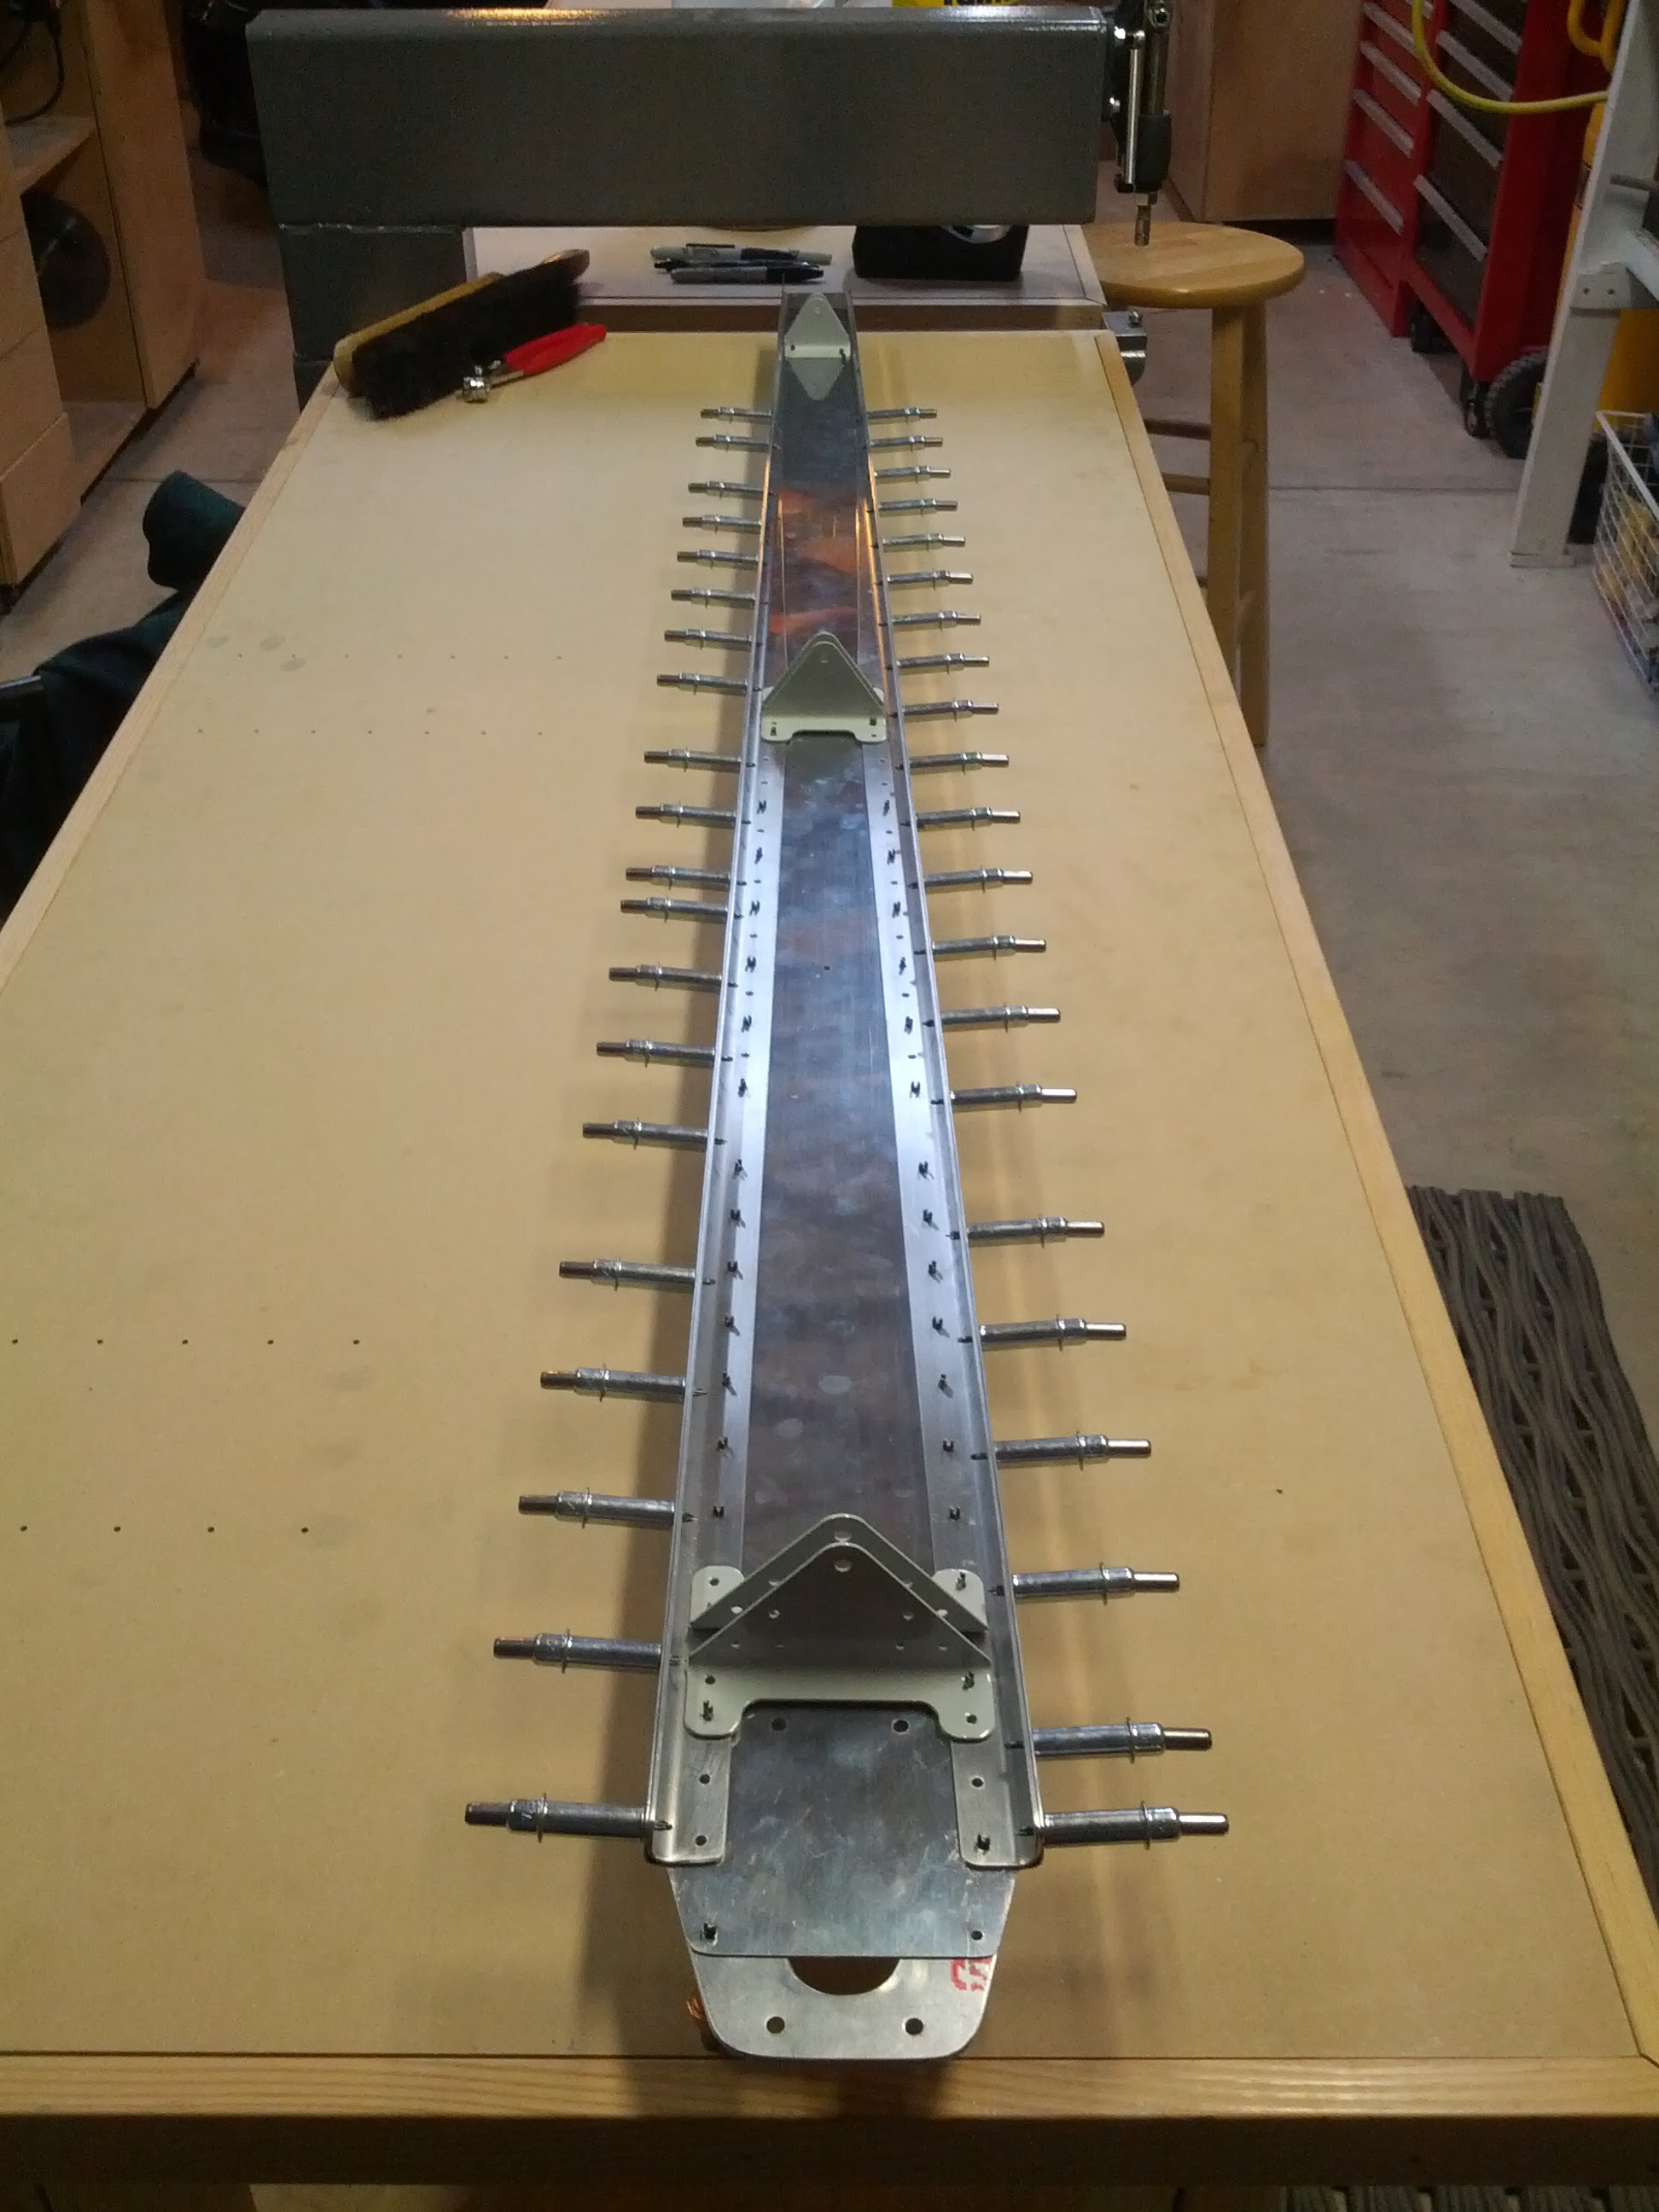
Most of the progress was disassembling, deburring, reassembling. Ready for some more holes to be drilled. The white, powder-coated bits are the hinge brackets for the rudder. The VS-1008 doubler that I spent 2 hours deburring is on the front of the spar (underside in this picture), so you can’t even see it.
I spent a fair amount of time looking for the hinge brackets. They were in with the little parts that Jonah put in bins. I hadn’t realized that there were parts like that in the bins, so I searched the shelves far and wide, first. I also have come to the conclusion that (as I suspected) we have arranged the parts on the shelf in a most ridiculous way: by subkit. The subkits were just for their packing purposes and are useless for actual parts sorting. I might take them all down this weekend and re-arrange by component.
Berck: 3 hours.
I know it seems a little soon, but have you thought of the final finish yet? Polished? painted? if you’re going to paint it will be a lot easier to shoot primer while it’s in pieces, plus you can get the primer in between the nooks and crannies, better for corrosion protection later.
First of many comments from the peanut gallery, I’m sure 😉
We’ve thought of it, but no decisions yet. I’d really like to just have a polished aluminum finish, but the much of the fuselage is fiberglass, so that has to be painted at least. After seeing how many dings the aluminum tends to get, I’m thinking leaving any of it polished may be a bad idea.
Much of what I’ve read suggests that priming the exterior surfaces early is generally a bad idea. If we do paint it, though, it’ll be in pieces before we take it to the hangar, but probably after we’ve completed the whole thing.
I’m currently more torn about what to do for the interior surfaces… I’m leaning toward not priming anything unless it needs to be primed, but I’m a bit worried about corrosion in places with nicks and scratches… how do I know if I nicked the alclad?
The alclad is only, like, a thousandth thick if I remember right, so if there’s a scratch it’s probably nicked, I wouldn’t lose any sleep over it, just do the best you can to protect the parts.
Anywhere you have a steel part touching aluminum there definitely needs to be something between them (your rudder hinges are steel I’m guessing, which is why they’re powder coated).
It’s weird, in A&P school they told us that it’s a bad idea to have paint between the two layers of a joint, but then every airplane I’ve worked on since then seems to do that on purpose and it’s not like they’re falling apart, and the ones that have primer on the interior skins generally have zero problems with corrosion. So, even if you’re planning to polish the exterior I would still at least prime the interior, maybe even paint it if you want it to really stand out.
Basically I would mock everything up, do as much of the drilling as you can, then disassemble and prime everything, then rivet it together.
As far as dents and scratches go, there should be a plastic film on the skins, obviously only remove the parts you have to to rivet (Don’t do like my friend did and use a razor blade to cut them like the skin is a cutting board, hah!). For flush rivets polish your rivet set every once in a while. There is plastic tape you can buy to put over the row of rivets that will protect the skin (Only use the real stuff, some tapes are impossible to get off after you rivet on them). Just take your time and be super careful, most scratches will polish out, dents are a little tougher, but once it’s perfectly polished no one will notice them anyway, and if you’re really OCD I guess you can just keep buying skins until it’s perfect (Don’t laugh, I know someone… Oshkosh trophy winner, but at what cost?! 😉 ).
If I were you I would drill apart your practice projects a couple times and re-rivet them together. You’re going to be doing a lot of drilling out of rivets, and if you drill one out wrong you end up with an oversize or elongated hole, so the more practice you can get prior to doing it on the actual airplane the better off you’ll be.
I don’t know how much experience you have, If you already know a lot of this stuff, just ignore me, feel free to message me anytime if you need advice, of course.
All good information, thanks! I have exactly zero experience.
There are endless debates about priming and not priming the interior surfaces. I don’t want to waste a ton of time doing something that’s not at all necessary, and worse, adds weight. I know lots of RVs are flying with nothing but non-alclad parts primed, and that’s what I’m planning on doing. Certainly there are tons of 50-60 year old certified aircraft flying with no coating on the interior aluminum. And the plane is going to be based in Colorado where nothing corrodes. How much corroded interior aluminum have you seen? Am I crazy to not prime?
Vans says to remove the PVC on all the parts as soon as you plan to use them, so that’s what I’m going to do. I’m not going to play the soldering iron game of removing strips of it where I have to rivet, because folks who have done that often report that it causes more problems than it’s worth. Apparently removing that stuff after a few years becomes much more difficult, and the places where you do remove it allow metal shavings to collect under the edges and it’s just no good. So I’m pulling it off as soon as I start to work on a part.
Sure, there will be more scratches/scuffs to polish out if I want the surface to be polished when I’m done, but that’s the way polished surfaces go. If I decide to paint, the first thing you have to do is scuff it up anyway, so leaving them on there is silly.
I’m definitely not going for trophy-winner on my first airplane. I’m going to make mistakes, I’m sure, but I’m not going to reorder skins for cosmetics. I want to make the best airplane I can make within what I consider reasonable limits.
We did end up drilling out one of the practice projects and redoing it (we made an error that we could have gotten around, but drilling the rivets was good practice). Especially since I discovered how easy it is to drill all the way through the rivet instead of just the head, which I know is bad.
I’ve never seen corrosion that made an airplane unairworthy except for cases where a bare steel part was touching bare aluminum, and then the cases I’ve seen are downright scary (like, one good rudder kick and your tail falls off scare). However, I do often see little corrosion “Snakes” at skin lap joints, typically because something like water or battery acid or something got in between the lap joint and sits there for a while. Typically it’s with airplanes that live outside, hangared airplanes are nearly always in better shape.
The way alclad is designed is that the pure aluminum cladding corrodes sacrificially, If you leave it unpainted In a few years the surface of the skin will get a powdery finish, once that happens it wont corrode any further and should last forever, unless the finish is upset somehow or the airplane takes a swim, or something like that. I would probably at the very least alodine everything that you’re attaching to the skin like ribs and doublers and stringers, etc.
In the mid 60’s airplane manufacturers realized that most people bought an airplane, flew it for about 10 years, and then bought another one, so why were they spending effort and money protecting them from corrosion when they’d likely be parted out long before it would become an issue? Unfortunately, as you probably remember from when you were learning to fly, a lot of those airplanes are still around 😉